Databases usually have four main actions available for working with data: Create, Read, Update, Delete. Those four actions are also often referred to as CRUD.
In this lesson, we’re going to look at the first two of those actions: Create and Read.
Creating a database record
After having set up a MongoDB database and defining schemas and models, it’s time to actually create database records.
Mongoose follows an object-oriented approach when it comes to working with models. Even if JavaScript doesn’t stricly speaking follow the same object-oriented patterns as other languages, you can think of a model like a class in the object-oriented model.
Let’s say we have a model in a cookie shop application that looks like this:
const cookieSchema = new mongoose.Schema({
  slug: { type: String, unique: true, required: true },
  name: { type: String, required: true },
  priceInCents: { type: Number, required: true },
  isInStock: { type: Boolean, default: true, required: true }
})

const Cookie = mongoose.model('Cookie', cookieSchema)
In the code above, the Cookie can be seen as a class. From that class, we can create new instances where each instance represents an individual cookie object.
💡 If this talk of classes and objects seems foreign to you, chances are you aren’t familiar with object-oriented programming. You don’t need to be an expert. But knowing the basic concepts or object-oriented programming would be helpful. It’s particularly important to know what instances are and how they relate to classes. You can learn about it on MDN.
Let’s say we want to create a new cookie record in the database. If you haven’t, let’s create a route for that:
app.post('/cookies', (request, response) => {

  response.send('Cookie Created')
})
Remember, it’s best practice to use the correct HTTP methods for whatever you want to do. In this case, we want to create a cookie record. So we’re using the post method.
In that function, we can now call the Cookie model and use JavaScript’s built-in features for creating instances of a function, using the new keyword:
app.post('/cookies', (request, response) => {
  const cookie = new Cookie({
    slug: 'chocolate-chip',
    name: 'Chocolate Chip',
    priceInCents: 350
  })

  response.send('Cookie Created')
})
As the parameter of new Cookie() we’re passing an object where each key matches one of the keys defined by the cookieSchema above.
Notice how we left out the isInStock property even though it’s set to be required? We can do that because we also gave it a default value.
If we now were to send a POST request to the /cookies route, the record would, however, not yet be created. That’s because by just creating an instance you don’t actually write to the database yet. It’s just a temporary object that you can still work with and change to your liking until you want to commit and save it in the database.
Coming from the mongoose.model() function, Cookie has some predefined functions. One of them is .save(). That’s the function you can use to save the record - as it is at that moment - to the database.
app.post('/cookies', (request, response) => {
  const cookie = new Cookie({
    slug: 'chocolate-chip',
    name: 'Chocolate Chip',
    priceInCents: 350
  })
  cookie.save()

  response.send('Cookie Created')
})
Pay attention to the capitalization here. The cookie variable represents the instance of just a single cookie record. The Cookie with a capital C represents the model, which acts like a class.
You can now make a post request to that route, and it’ll create a cookie record in the database. You can try it out using cURL in the command line:
curl localhost:3000/cookies -X POST💡 Need a refresher or don’t remember what cURL is? Just check out this very short overview of what cURL is and how it works: /development-basics/v1/curl
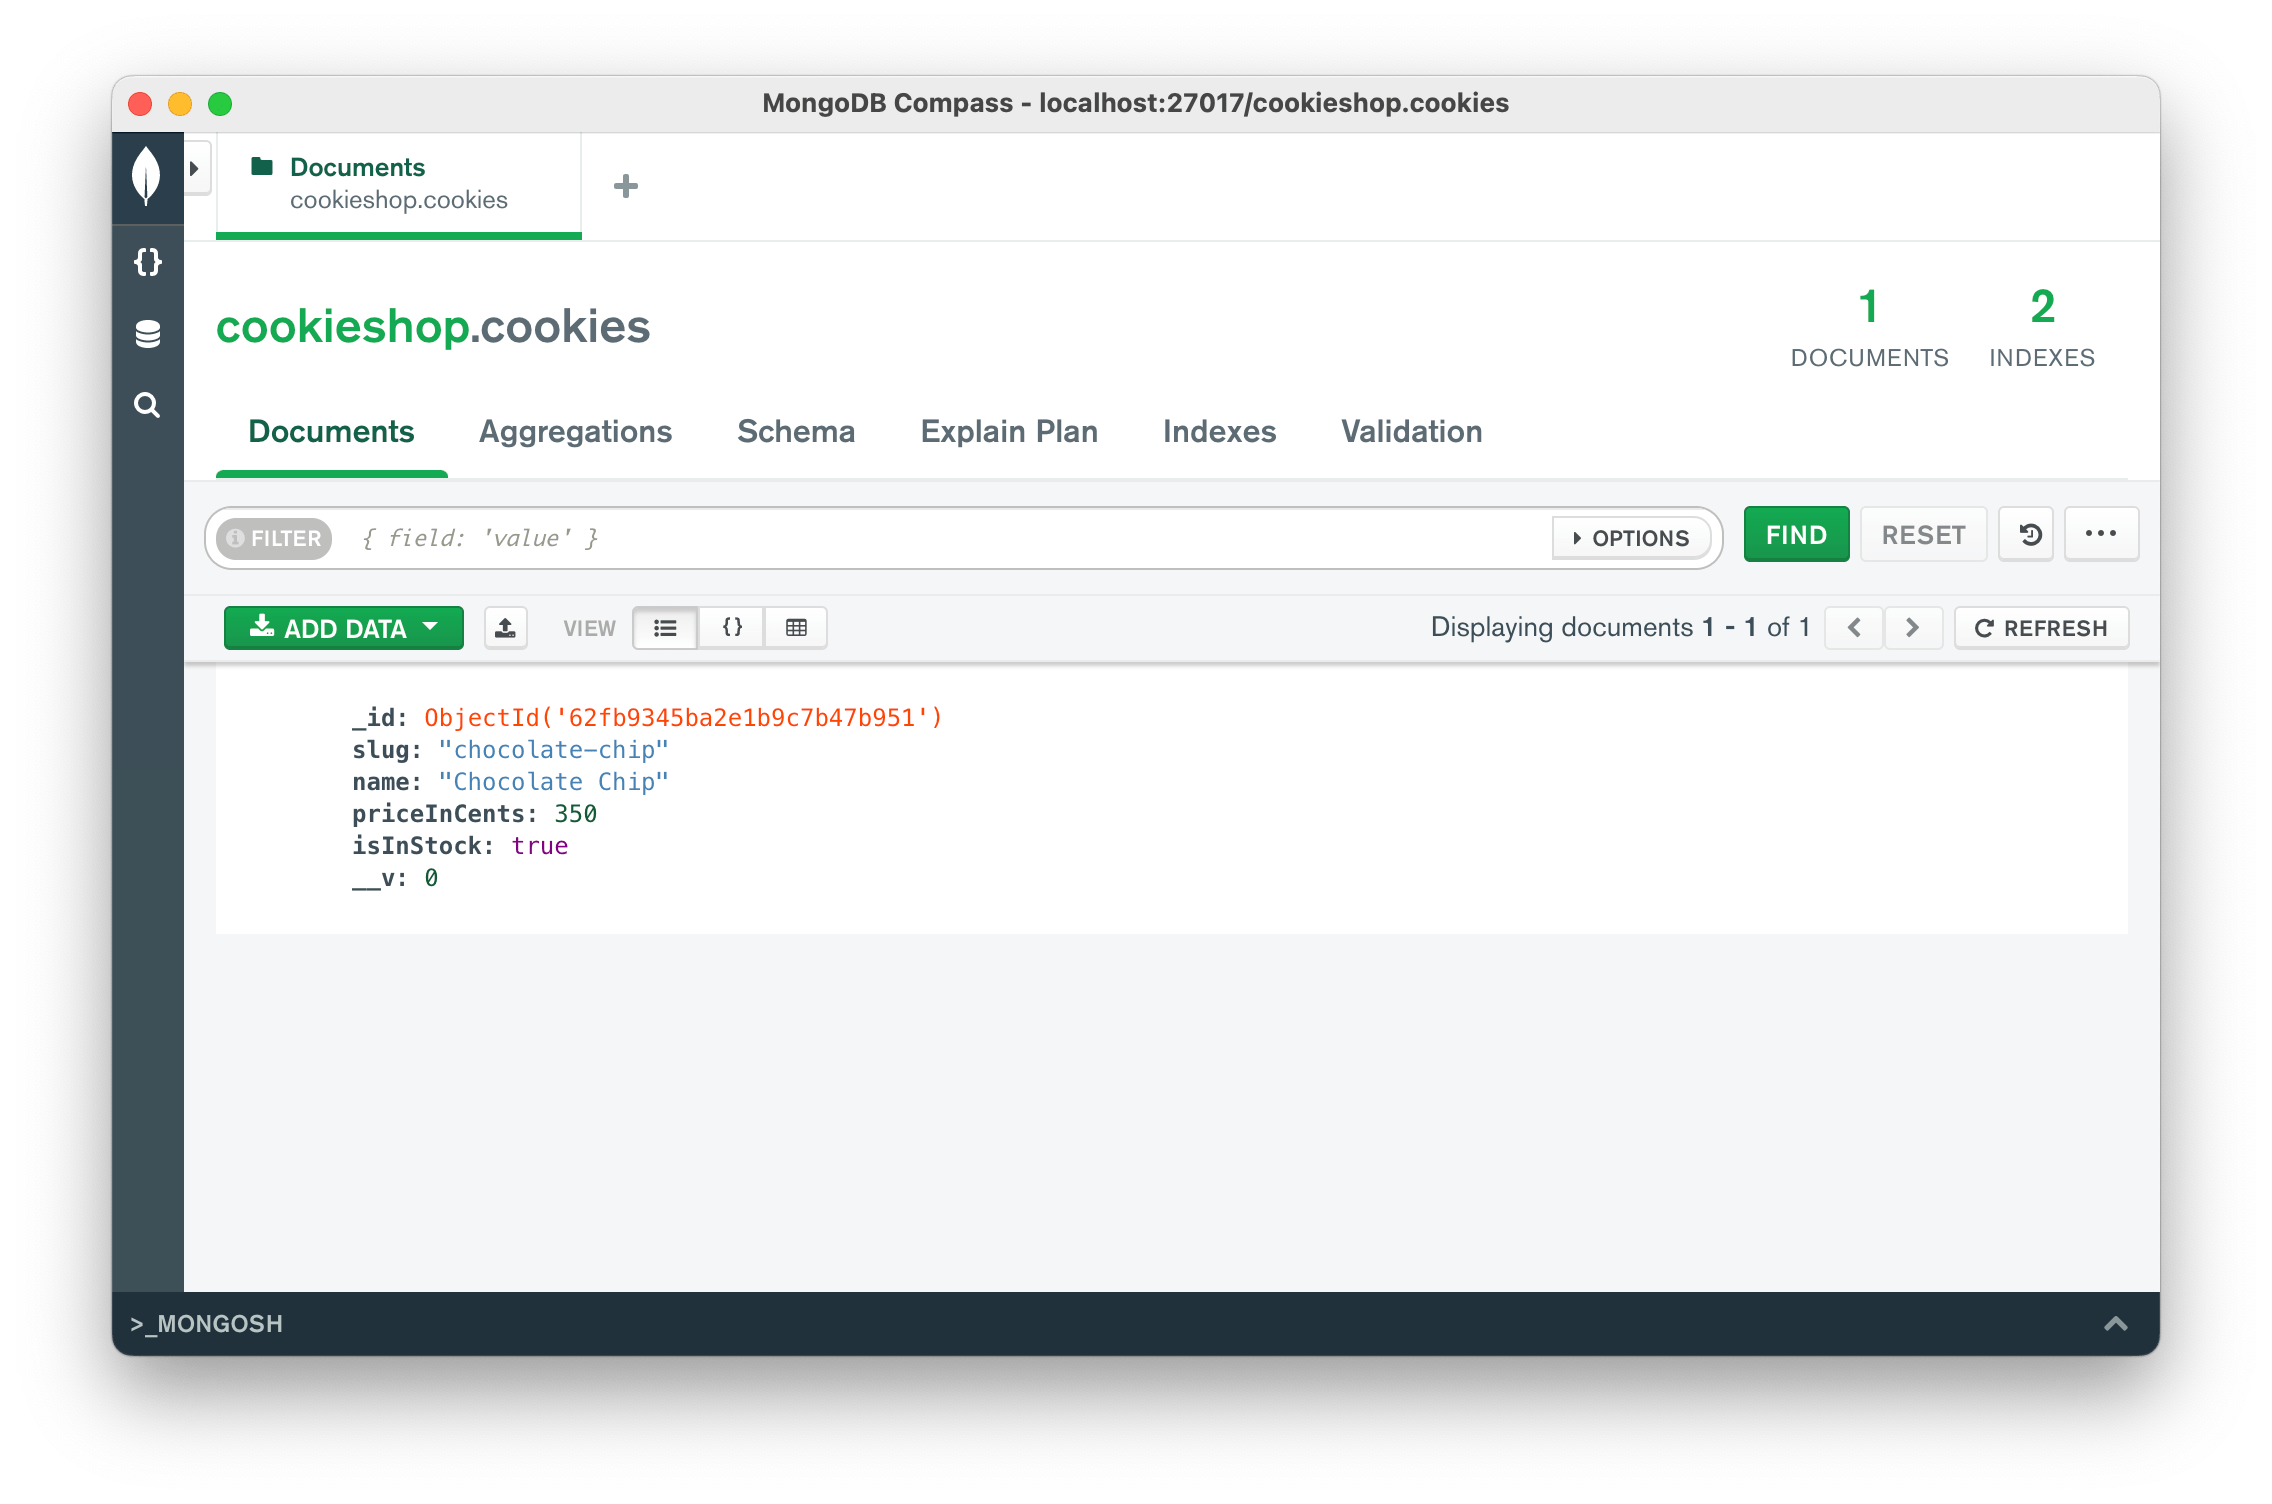
If you have MongoDB Compass installed, you can now open it and then connect to your local database. Then, click on the tab “Databases” at the top and select the name of the database that you defined, for example, “cookieshop”. There you should find an overview of all the collections. It should show a “cookies” collection. If you click that, you should see the record we just created.
Error handling and asynchronous functions
If you run the same cURL command again, you should see the same message in the command line “Cookie Created”. But if you take a look at the output of the command line window that has the server running, you’ll notice an error message. You may have to scroll up a bit. But eventually, you’ll probably find an error message that says something like this:
(node:10139) UnhandledPromiseRejectionWarning: MongoServerError: E11000 duplicate key error collection: cookieshop-express.cookies index: slug_1 dup key: { slug: "chocolate-chip" }That’s actually a good error! It shows that the unique: true part of our schema definition above works. If you refresh the view in MongoDB Atlas, you should still see only one record. The record could not be created because we tried to create a second record with the slug chocolate-chip, even though the slug is defined to be unique, and we already have a record with that slug.
But why did we still see the message Cookie Created? Why did we not get an error as the client making a request through curl?
That’s because the save() function is an asynchronous function returning a promise, and it’s on purpose. Many functions provided by Mongoose are asynchronous. That means, as they execute, they don’t block the rest of the code. The .save() function hands over the command to save the database record to the database. While the database (which is an entirely separate application from your own code) is busy working on saving the data, your application code just continues running.
This means, as your application code is already executing response.send(), the MongoDB application is still busy saving the record in the database. If an error occurs, it’s already too late to let the application know because chances are, the response has already been sent out to the user, and the request-response-cycle is closed.
In some situations, that’s exactly what we want. Sometimes, we want our application code to keep running while the database (or some other service) works in parallel to do something else - like saving some data. Maybe we don’t want the user to know if an error happened. It only should be something the developers know. But the user should just go about their day without knowing if something broke in the background.
But in many cases, we want to actually wait for the database to do whatever it’s doing in order to find out if the saving has been successful or if an error occurred. And based on the result, we either return a successful response or an error message to the client.
One solution would be to use the then() and catch() functions and move the response.send() in there. In this example, you’d remove the existing response.send() line. And instead, write this:
cookie.save()
  .then(() => response.send('Cookie Created'))
  .catch((error) => response.send('Error: The cookie could not be created.'))
In this example, the response has been moved inside the callback functions of the promise.
An alternative, and in my opinion, easier-to-read approach, is to use JavaScripts async-await feature.
app.post('/cookies', async (request, response) => {
  const cookie = new Cookie({
    slug: 'chocolate-chip',
    name: 'Chocolate Chip',
    priceInCents: 350
  })
  await cookie.save()

  response.send('Cookie Created')
})
You can see, we added the async keyword in front of the route function, turning it into an asynchronous function. This gives us access to the keyword await. That keyword does exactly what it looks like. It will block the entire execution of the function and waits until cookies.save() has been done executing.
But we’re still missing one thing. The function doesn’t handle any errors now. For that, we’d use JavaScript’s built-in try...catch block.
app.post('/cookies', async (request, response) => {
  try {
    const cookie = new Cookie({
      slug: 'chocolate-chip',
      name: 'Chocolate Chip',
      priceInCents: 350
    })
    await cookie.save()

    response.send('Cookie Created')
  }catch (error) {
    console.error(error)
    response.send('Error: The cookie could not be created.')
  }
})
Using try...catch, if any error occurs at any point in time within the try {} block, the code will stop executing and immediately jump to the catch(error) {} block.
If you use this code and now try curl localhost:3000/cookies -X POST in the command line again, you should get a proper error message also in the command line.
💡 Whenever you use
try...catch, it’s important that you make sure to log theerrorsomewhere. Otherwise, the error will just happen silently and you’ll never see anywhere what actually went wrong. In this example, we just added it to theconsole.error()to make sure it shows up on the backend’s console.
Creating records from HTML forms
In the example above, the data with which the cookie was created was pre-defined in the code. In a web application, you’ll probably more often want to let the users create records.
In the lesson on form data, we looked at creating HTML forms and reading their data in the backend. And in the lesson on HTML responses, we looked at creating HTML pages.
Combining both, you can create a new route for creating cookies in the database:
app.get('/cookies/new', (request, response) => {
  response.render('cookies/new')
})
A corresponding HTML template in /views/cookies/new.ejs could look like this:
<!DOCTYPE html>
<html lang="en">
<%- include('head', {title: "New Cookie | Cookieshop"}) %>
<body>
  <%- include('header') %>

  <main>
    <h2>Create a new cookie</h2>

    <form action="/cookies" method="POST">
      <input type="text" name="name" placeholder="name" required /><br />
      <input type="text" name="slug" placeholder="slug" required /><br />
      <input type="number" name="priceInCents" placeholder="price in cents" required min="0" step="1" /><br />
      <button>Save</button>
    </form>
  </main>

  <%- include('footer') %>
</body>
</html>
💡 The HTML code example above assumes the existence of three EJS partials:
head,header, andfooter. For details, see the practice task from the “HTML Response and Templating” lesson.
The form has some very basic frontend validation, making sure that all form fields are required. The min and step attributes on the number field make sure that the value entered is a whole number without decimals.
The form makes a POST request to the /cookies route. The parameters of the form will be available through the request.body object (as long as you make sure your application uses the express.urlencoded({ extended: true }) middleware).
As the last step, you only need to adjust the POST route function to use the properties of request.body instead of the predefined properties.
app.post('/cookies', async (request, response) => {
  try {
    const cookie = new Cookie({
      slug: request.body.slug,
      name: request.body.name,
      priceInCents: request.body.priceInCents
    })
    await cookie.save()

    response.send('Cookie Created')
  }catch (error) {
    console.error(error)
    response.send('Error: The cookie could not be created.')
  }
})
If you now try it out, you should be able to see the form under localhost:3000/cookies/new and submit it. You should be able to create cookie records in the database or receive an error message both on the client-side as well as in the backend’s console. As a developer, you always want the backend error message to be as detailed as possible to help you debug. But the error message displayed to the user should be more limited as you don’t want to reveal the inner workings of your code to every user out there.
💡 This page should of course not be available to the general public. If we run a shop we don’t want any person on the internet to just add items to our shop. The
cookies/newpage would usually be something that hidden behind a login for admins of the shop. So the shop owner can go in and create new records in the database as needed. There will be other lessons going over authentication and authorization and making specific pages available to only some users.
Recap
Actually creating records in the database is as straightforward as creating an instance of a function with all the properties you want to save. Then, you run the .save() function to actually tore the record in the database. That’s the main new functionality we looked at today.
On top of that, we spent some time to see how that would fit in within the context of an application. We looked at very basic error handling and asynchronous functions and finally went through a complete example of getting data from an HTML form to end up in the database.
🛠 How to practice
To recap what you have learned in this lesson, try to create a new page for letting an admin of the shop create news posts.
- You should have a
NewsItemmodel with at least the propertiestitle,content, anddate. - Create a new GET route to display the form, e.g.,
/news/new - The route should render an HTML template with a form to create new news items. So the form should include input fields for each of the
NewsItemproperties. - Create a new POST route that the form should submit its requests to, e.g.,
/news - Create new
NewsItemrecords in that POST route function
Do the same task in a separate project with your own idea of a model to keep practicing.
